
VPLEX adds a virtual storage layer between the SAN storage and the Server, normally SAN zoning will be between the SAN and the server. In VPLEX case the zoning is between the VPLEX and the Array from the back-end and the VPLEX and the Server from the front-end.
In details the SAN zoning steps are as following:
Before installing VPLEX the SAN zoning steps are:
- Zone the SAN directly to the server
- Create and present the LUNS to the server
After installing VPLEX the SAN zoning steps are:
- Zone the SAN to VPLEX appliance back-end ports
- Create and present the LUNs to VPLEX
- Zone the server to the VPLEX appliance front-end ports
- From VPLEX, take the LUNs and present them to the server
Stretched cluster is a deployment model where two servers are part of the same logical cluster but are located in two separate geographical area, VPLEX supports two kind of stretched cluster deployment VPLEX metro (synchronous) and VPLEX geo (asynchronous)
VPLEX makes stretched cluster deployment much easier, as it take care of the stretched Cluster LUNs deployment.
In this exercise we will demonstrate how to configure Stretched cluster LUN and present it to the servers, we are assuming the following:
- Zoning is already done
- Creating and presenting the LUNS from the SAN to VPLEX is already done.
In summary the steps that will be taken to present a LUN to a server after installing the VPLEX is the following:
- Discover the Array
- Claim all storage on Supporting Array
- Rename the storage volume LUN (Optional)
- Create an extent
- Create a Device
- Create Virtual Volumes
- Create Consistency Group
- Create Storage Views
- Discovery Array
Select the cluster that you present LUNs to and navigate to Physical Storage ==> Storage Array
Press on “Rediscover Array”


- Claim all storage on Supporting Array
Select the cluster that you present LUNs to and navigate to Physical Storage ==> Storage Volumes

When inside the Storage Volumes window you will have the device WWN presented not the LUN ID, you can confirm that by going to symmetrix and show the LUN information:
Example: symdev -sid Array# show 36c8


Select any of the new WWNs and press on “Claim all Storage on Supporting Array”


Select the LUNs that you want to claim


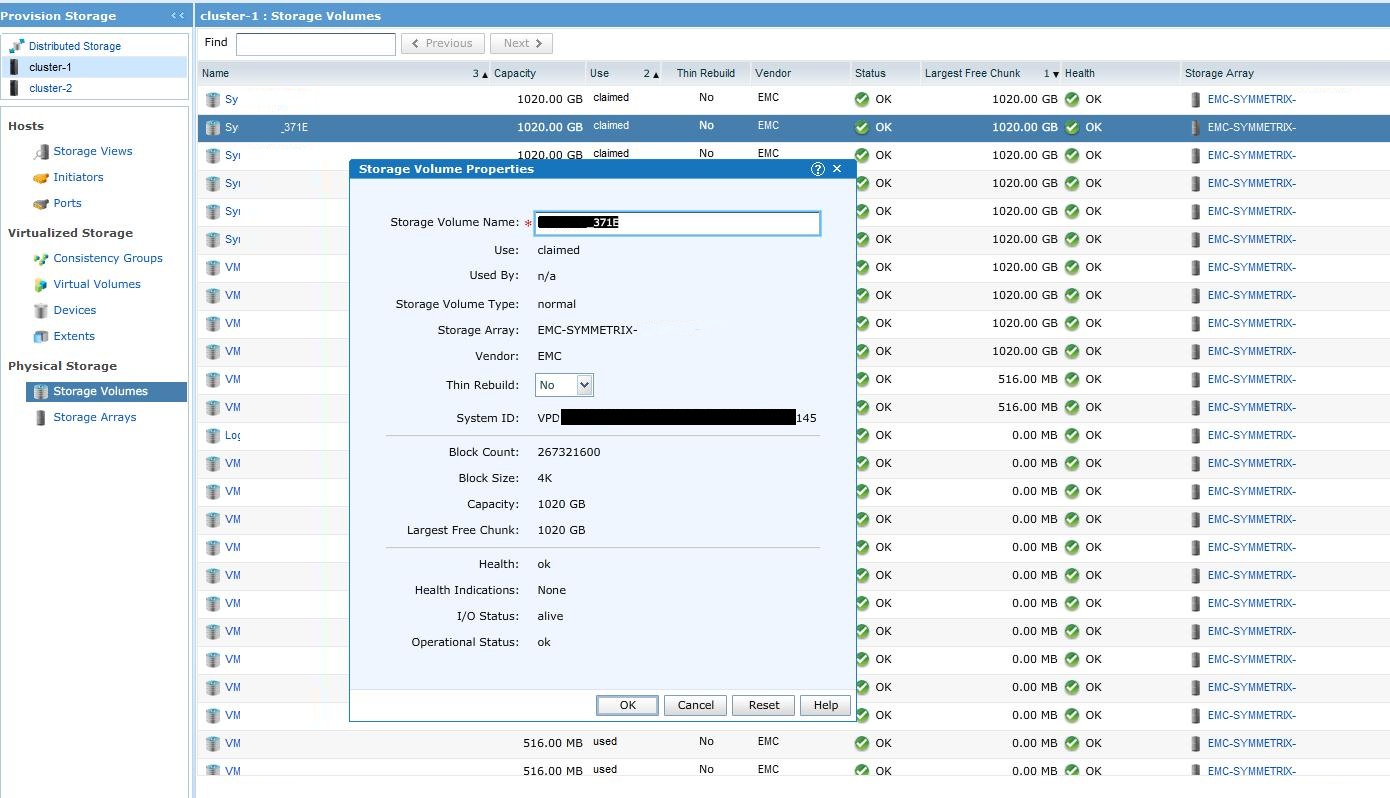
If you want to re-name the LUNs you can do that now, as now the VPLEX will name the WWN to LUN number

- Rename the storage volume LUN (Optional)
- Create an extent
Select the cluster that you present LUNs to and navigate to Virtualized Storage ==> Extents
Press “Create” then select the LUN or LUNs that you want to prepare as an Extent


- Create a Device
Select the cluster that you present LUNs to and navigate to Virtualized Storage ==> Devices
Press “Create” then select the Extent that you want to prepare as a Device
- Select “1 to 1 mapping” if you want to create a “Stretched Cluster”


- Create Virtual Volumes (Local Copy only)
Select the cluster that you present LUNs to and navigate to Virtualized Storage ==> Virtual Volumes
Press “Create” then select the Device that you want to add to the Virtual Volume


Please note: I will explain how to create distributed groups later.
- Create Consistency Group
Select the cluster that you present LUNs to and navigate to Virtualized Storage ==> Consistency Group
Press “Create”, Type a name for the consistency group, please remember if you created a Distributed Device, you will be able to select “Distributed: All cluster” if you only created a local device, you can only select “Local: Cluster X”

If you are adding a local group and you are planning to add the mirror devices later, you should make sure you enable “Global Visibility”

Select the fail over policy


- Create Storage Views
Select the cluster that you present LUNs to and navigate to Hosts ==> Storage View
Press “Create”, Type a name of the storage view, most storage admins use the name of the server to differentiate between storage views.
Select the Host Initiators to add to the storage view


Select the ports to add to the storage view

Select the virtual volumes to add to the storage view


